The Right Place
Beebalms grow and flower best in full sun, but they'll also do well in light shade. The flowers may wilt in very hot sun and they need more water in this situation. Plant them in spring in rich, moist, humusy soil. They are not particular about whether it is acid or alkaline. Group several plants, setting each one at least 12 to 15 inches apart because they grow and spread quickly. Because of their weedy habit, these plants need room. They need a site where there is good air circulation as well. When young plants are 4 to 6 inches tall, pinch back their tips to encourage them to branch out.
 |
Planting Nursery Stock
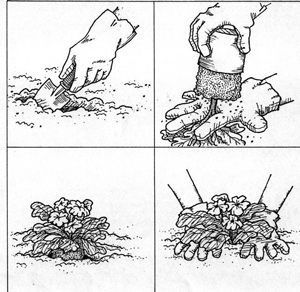
Dig a hole about the size of the container in which the beebalm plant has come from the nursery or garden center. Rap the bottom of the pot to dislodge the plant and gently remove it. Untangle any roots that are matted, or have started to wrap around the rootball. Set the plant in the hole so that the top of the rootball is even with the soil surface. Fill the hole with soil, pressing it gently around the stems. Water well for several weeks until the plant is established. Do not fertilize.
Propagating
The easiest way to acquire more beebalms and control their spread is to divide, or thin, them. When they begin to crowd their neighbors, wait until spring (fall is OK in Florida) and then dig up the plant's shallow clump of roots. Distinguish the older roots toward the middle of the clump from the newer ones near the edges. With a sharp spade or knife slice away 4 to 8-inch chunks of newer roots, leaving the old ones to be discarded. Replant the divided clumps. They will generate attractive new plants

